

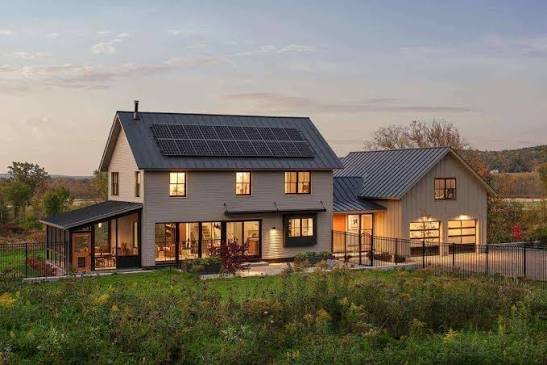
Every photo of a net zero home shows the same thing. Flat roof. Big south glass. Solar array laid out like a grid. Built last year.
So the average owner of a 1974 side-split looks at their popcorn ceiling and assumes the door is closed.
It isn’t. Deep retrofits of 1960s and 1970s housing stock happen across Canada every year, and some of them hit net zero. The catch is that the process looks nothing like building new. It happens in stages, over years, in a fixed order. Skip the order and you burn money.
Here is how it actually works.
Net Zero Means the House Makes as Much Energy as It Uses
Over a full year, the home produces at least as much energy as it consumes. Not each day. Not each month. Annually.
In winter a Canadian net zero home pulls power from the grid. In summer the solar array sends more back than the house uses. The two roughly cancel out across twelve months.
Net Zero Ready is the target most retrofits should aim at
There is a second, more practical standard. A Net Zero Ready home has the envelope and mechanical systems needed to reach net zero, but the solar array hasn’t been installed yet. Everything is prepared: roof structure checked, conduit run, panel space reserved.
That distinction matters enormously for retrofits. The hard, expensive, disruptive work is the building itself. Panels are a purchase decision you can make later, when prices drop again or when you have the cash.
For most 1970s homes, aiming at Net Zero Ready is the realistic goal. Getting the array on afterward is a weekend for a crew.
| Term | What it means | Where it fits in a retrofit |
| Net Zero | Annual energy production equals annual consumption | The finish line |
| Net Zero Ready | Envelope and systems done, solar not yet installed | The real target for most retrofits |
| Deep energy retrofit | 50% or greater reduction in energy use | Achievable in most 1970s homes |
| Deep retrofit to Net Zero Ready | 70% to 80% reduction plus full electrification | Achievable, needs planning and budget |
A 1970s House Is a Better Candidate Than a 1990s House
This surprises people. Older is often easier.
Homes from that era were built with simple shapes. Rectangles and basic splits, not the complicated rooflines and bump-outs that came later. Fewer corners means fewer places for heat to escape and fewer awkward details to insulate.
They also have almost nothing worth protecting in the walls. There is no exterior air barrier to work around, no spray foam already in place, no engineered assembly you might damage. You are adding to a blank slate rather than fixing somebody else’s attempt.
| Building element | Typical 1970s Canadian construction | Net Zero Ready target |
| Attic insulation | R-20 to R-28 loose fill | R-60 to R-80 |
| Wall insulation | 2×4 studs, R-12 batt, often gapped | R-30 to R-40 effective |
| Basement walls | Bare concrete or partial stud wall | R-20 continuous |
| Basement slab | Uninsulated | R-10 where feasible |
| Windows | Single pane or early sealed double | Triple glazed, U-value 0.16 or lower |
| Air barrier | None, or poly added late in the decade | Continuous, verified by blower door |
| Airtightness | 6 to 12 air changes per hour at 50 Pa | 1.0 to 1.5 ACH50 |
| Ventilation | Bathroom fans and leaks | Balanced HRV or ERV |
| Heating | 60% to 78% efficient oil or gas furnace | Cold-climate heat pump |
| Water heating | Gas or electric tank, 55% to 90% | Heat pump water heater |
Look at the gap between those two columns. It is large. It is also entirely made up of work that tradespeople in every Canadian city already do.
The Order Is Not Negotiable
This is the section that saves people the most money, so it gets the most space.
A retrofit done in the wrong sequence costs more and delivers less. Not slightly. Dramatically. Solar installed before insulation means you paid for panels to power heat that leaves through the attic. A heat pump sized before air sealing means you bought two tons more equipment than the finished house will need, forever.
Work outward from the building shell to the equipment to the generation. Always.
Stage one: measure before you touch anything
Start with an energy assessment that produces numbers, not opinions. What you need out of it:
- A blower door test result in ACH50 or litres per second at 50 Pa
- Infrared or documented findings on where the leaks actually are
- Current insulation values verified by inspection, not assumed from the build year
- A modelled heat loss for the house as it stands today
- A modelled heat loss for the house after planned envelope work
- A ranked list of measures by cost per unit of energy saved
That second heat loss number is the one people forget, and it is the one that sizes your future heat pump correctly. Without it, you either buy equipment for the old house or you guess.
An assessment that ends with “you should add attic insulation and get a new furnace” without any of the above is not an assessment. It is a sales call.
Stage two: air sealing, the cheapest win nobody gets excited about
Air leakage typically accounts for 25% to 40% of heat loss in a 1970s house. Sealing it is unglamorous, invisible when finished, and returns more per dollar than anything else you will do.
The leaks are almost never where homeowners think. Windows and doors get blamed constantly and rarely matter much. The real culprits sit out of sight:
- The attic hatch, usually a bare sheet of plywood with no gasket
- Top plates of interior walls, open into the attic in most homes of that era
- Plumbing stacks and wiring penetrations through the ceiling
- Recessed light fixtures, each one effectively a hole in the ceiling
- The rim joist band above the foundation, all the way around the house
- Chimney chases and old duct chases running floor to attic
- The sill plate where wood meets concrete
Sealing these with caulk, canned foam, sheet material, and fire-rated sealant where required typically costs $1,500 to $5,000 for a whole house. It routinely cuts leakage by 30% to 50%. Nothing else in a retrofit comes close on cost per unit saved.
Do this before insulating the attic, because once there is two feet of cellulose up there, the ceiling penetrations are gone from reach.
Stage three: insulation, in order of payback
Attic first, always. It is accessible, cheap per R-value, and heat rises.
Basement and rim joist second. A bare concrete basement wall in a 1970s house often bleeds 15% to 20% of total heat loss, and homeowners ignore it because the basement “feels fine.”
Walls last, because they are the most expensive and most disruptive. Two realistic approaches exist. Drill and fill blows loose insulation into empty stud cavities from outside or inside, cheap but limited by the 3.5 inch cavity. Exterior continuous insulation adds rigid board or mineral wool outside the sheathing before new siding, which fixes thermal bridging through the studs and gets you to genuinely high effective R-values.
The exterior approach only makes financial sense when the siding is due for replacement anyway. If your cladding has fifteen years left, drill and fill now and plan the exterior work for later.
Stage four: windows are overrated, and here is the math
Homeowners want to replace windows first. It feels like progress and the sales pressure is heavy.
Windows are usually 10% to 20% of a home’s heat loss. New triple glazing might cut that portion in half. Meanwhile the job costs $15,000 to $40,000 for a whole house. The payback runs decades.
Replace windows when they are failing, when the frames have rotted, when condensation runs down the glass, or when you are already doing exterior work. Replace them for comfort near seating areas. Do not replace them as your opening move in a net zero plan.
Stage five: ventilation becomes mandatory once you tighten up
A house at 8 ACH50 ventilates itself through its own defects. A house at 1.5 ACH50 does not. Once you seal properly, mechanical ventilation stops being optional and becomes a health requirement.
A heat recovery ventilator or energy recovery ventilator brings in filtered outdoor air, pushes out stale indoor air, and passes them through a core that transfers 60% to 85% of the heat between the two streams. You get fresh air without throwing away the energy you just paid to keep.
Budget $2,500 to $6,000 installed, more if new ducting is needed.
Stage six: now, finally, the heat pump
By this point your house needs far less heat than it did. Run the CSA F280-12 calculation again on the improved envelope and size the equipment to that number.
This is where staging pays for itself in hard cash. A 1970s house before retrofit might need a 4 or 5 ton heat pump. After envelope work, 2 to 3 tons often covers it. That is a smaller unit, sometimes a smaller electrical draw, and often no panel upgrade.
Stage seven: water, appliances, and the last of the gas
Heat pump water heaters use roughly a third of the electricity of a resistance tank. Induction cooking removes the last gas appliance from the kitchen. LED lighting throughout is trivial now.
Once the gas furnace, water heater, and range are all gone, you can cancel the gas connection and stop paying the fixed monthly charge, which in some provinces runs $25 to $40 a month regardless of use.
Stage eight: solar, sized to a house that has stopped wasting energy
Now count what the house actually consumes and size an array to match.
A 1970s house before retrofit might use 35,000 kWh a year once electrified. After a deep retrofit, 12,000 to 16,000 kWh is realistic. The array to cover the first number would be enormous and would not fit on most roofs. The array to cover the second is a normal 8 to 12 kW system.
Sizing solar last is not a preference. It is the only way the arithmetic works.
One Warning Before Anybody Opens an Attic
If your house was built or insulated between the 1950s and 1990, have any loose grey-brown pebbly attic insulation tested for vermiculite containing asbestos before a single person disturbs it.
Where 1970s Houses Fight Back
Not everything about that era is friendly.
| Challenge | Why it happens | How it gets handled |
| Vermiculite in attics | Common insulation product of the era | Professional testing, then abatement or encapsulation |
| Knob-and-tube remnants | Partial rewiring left old circuits live | Electrical inspection, rewire affected areas before insulating |
| 60 or 100 amp service | Sized for a gas-heated home | Load calculation, smart panel or load management |
| Low basement headroom | 6’6″ ceilings common | Thinner high-R rigid foam instead of stud walls |
| Aluminum wiring | Used 1965 to 1975 | Pigtailing with approved connectors by an electrician |
| Masonry chimney orphaning | Water heater left alone after furnace removal | Reline or remove when the last gas appliance goes |
| Ductwork sized for high-temp air | Gas furnaces ran hot supply air | Duct resizing or a ductless approach |
None of these stop a retrofit. All of them cost money if discovered mid-project instead of during planning.
What a Staged Retrofit Actually Costs and Saves
Figures below are for a roughly 1,800 square foot detached 1970s home. Real costs vary by region, contractor availability, and how much you do yourself.
| Stage | Typical cost | Energy reduction gained | Running total saved |
| Assessment and modelling | $400 to $1,200 | 0% | 0% |
| Air sealing | $1,500 to $5,000 | 12% to 20% | 12% to 20% |
| Attic to R-60 | $2,500 to $5,500 | 8% to 14% | 22% to 32% |
| Basement walls and rim joist | $6,000 to $14,000 | 10% to 16% | 32% to 46% |
| Wall drill-and-fill | $4,000 to $9,000 | 6% to 10% | 40% to 55% |
| HRV or ERV | $2,500 to $6,000 | Small direct gain, large health gain | 40% to 56% |
| Cold-climate heat pump | $14,000 to $24,000 | 15% to 25% | 58% to 75% |
| Heat pump water heater | $3,500 to $6,000 | 4% to 8% | 62% to 80% |
| Solar array, 8 to 12 kW | $22,000 to $38,000 | Offsets remainder | Net Zero possible |
Total for the envelope and mechanical portion, meaning Net Zero Ready, lands somewhere between $34,000 and $70,000 across several years. Solar adds the last chunk.
That is a lot of money. It is also spread over a decade in most cases, overlapping with work you would have done anyway. Nobody replaces a 45-year-old furnace and 40-year-old siding for free.
Doing It All at Once Usually Costs More
There is a strong argument for phasing beyond just cash flow.
Each stage changes the numbers for the next one. Air sealing changes the heat loss, which changes the heat pump size, which changes the electrical load, which changes whether you need a panel upgrade. Lock in all your decisions on day one and you will be sizing equipment for a building that no longer exists by the time it is installed.
Phasing also lets you piggyback on natural replacement cycles. Siding due? That is when exterior insulation is cheap, because you are already paying for scaffolding and removal. Furnace dying? That is when a heat pump competes against the full cost of a new furnace rather than against a working one.
The homeowners who spend the least are the ones who plan the whole ten-year sequence up front, then execute pieces of it as roofs, furnaces, and windows reach end of life anyway.
The Answer
A 1970s house can absolutely reach net zero, and the process is well understood enough that you can plan it on a spreadsheet before spending a dollar.
What separates the projects that work from the ones that stall is sequence. Envelope, then equipment, then generation. Measure the building before every stage and re-measure after. Size the heat pump to the house you will have, not the one you have now. Put the panels on last, once there is less to power.
Start with an assessment that hands you real numbers and a ranked plan. Then take the first two stages, which cost the least and return the most, and get them done before you shop for a single piece of equipment. The rest can wait for the year your furnace dies.